

How To Draw A Swimmer In The Water Step By Step
It Looks Difficult, Only It'southward Like shooting fish in a barrel
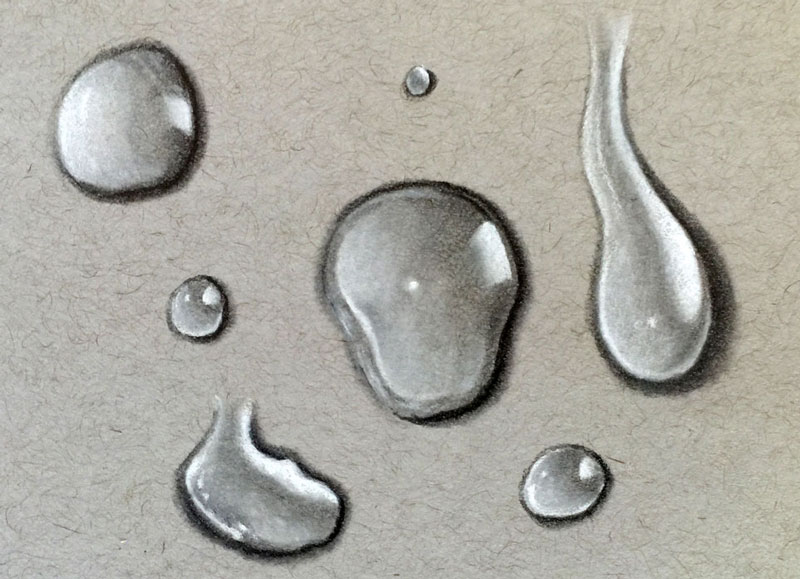
It may seem similar a hard task to draw realistic water droplets. Fortunately, It'south relatively elementary to create this illusion in your drawing. This look is hands achieved by only understanding the principles of how light behaves on (and actually within) a transparent object. Lite behaves in a completely dissimilar fashion on a transparent object than it does with a solid object.
By understanding the light'south behavior and recording the correct locations of light and night values, the illusion of h2o droplets is developed. Once you lot take a basic understanding of the location of values, then water aerosol are easily added to any surface in a cartoon.
How Lite Behaves in a Water Droplet
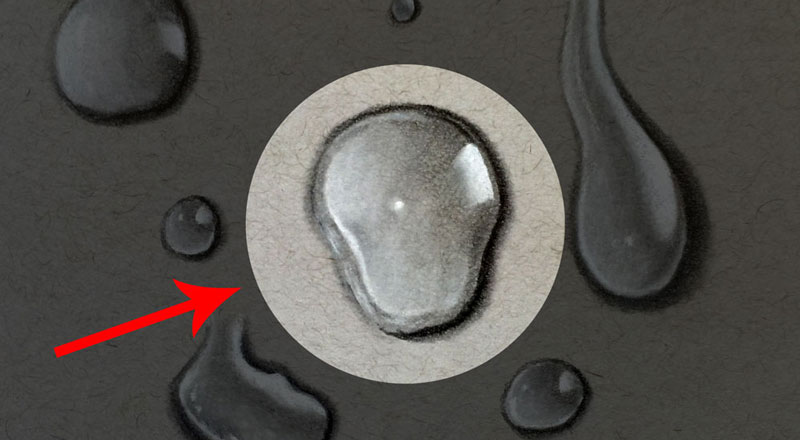
Instead of bouncing off of the surface, as we meet with solid objects, a practiced corporeality of lite is able to penetrate a water droplet. Some light is nevertheless reflected, producing a highlight, but much of information technology enters the droplet. In this example, we run into a direct and dominant lite source originating from the right side of the picture plane. A strong highlight is clearly visible.
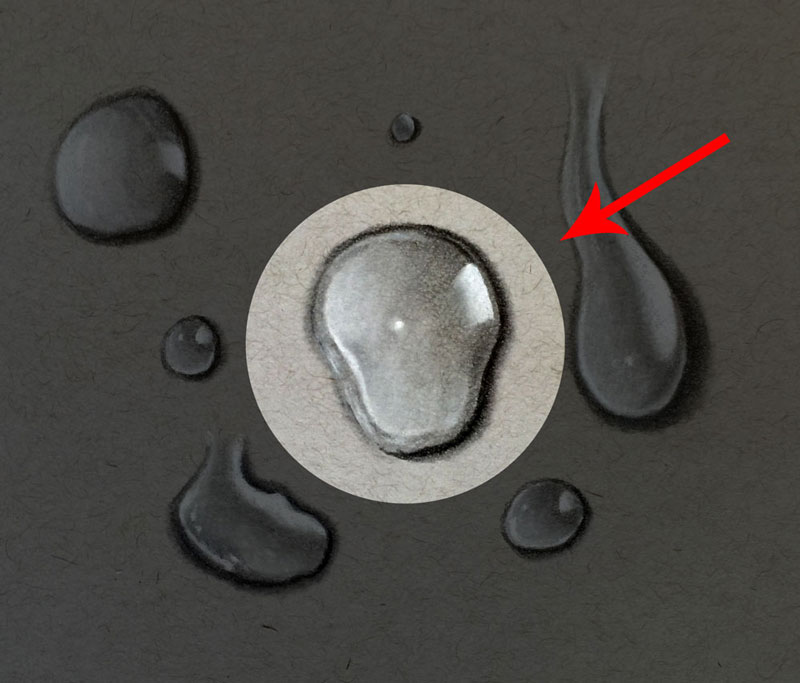
Calorie-free waves are so refracted, angle and dispersing the light within the droplet. As a result, low-cal waves are sent to the side of the droplet, opposite of the dominant light source.
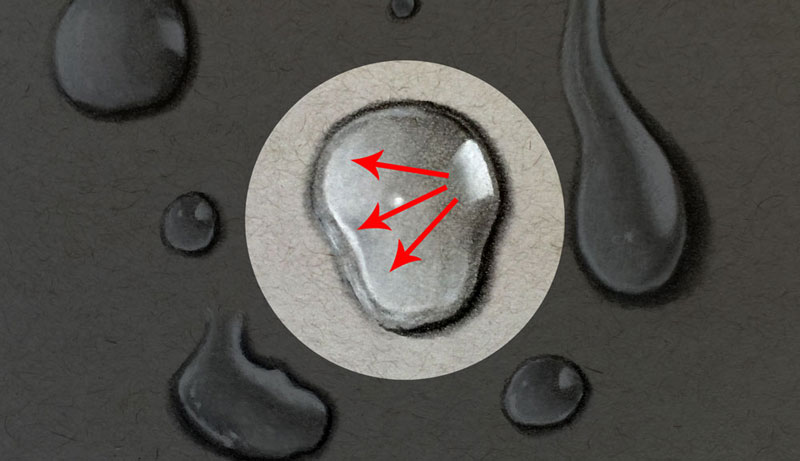
This produces an area of lighter value positioned opposite from the dominant light source. On solid objects we expect to run across an area of core shadow in this location, but in this instance, nosotros run into lighter values that are evenly distributed.
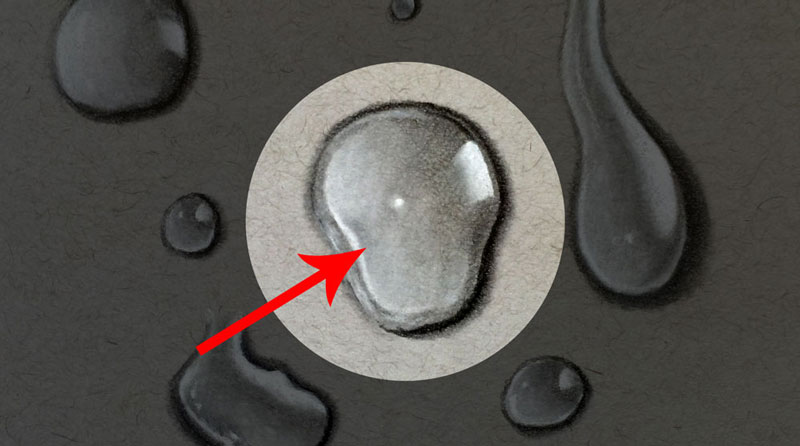
Some other interesting matter happens around the strong highlight. The values are really darker in this surface area instead of beingness lighter as nosotros would meet with a solid object.
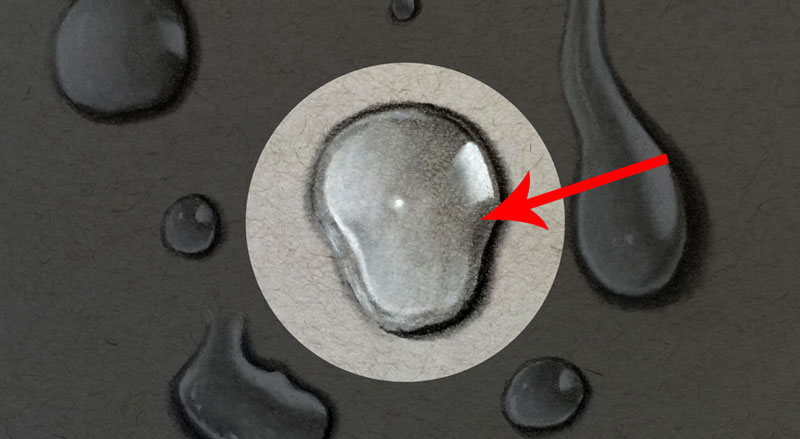
In this example, a secondary light source is also affecting the locations of value. This lite source is weaker, but positioned at more extreme angle. This secondary low-cal is originating from the lower left portion of the motion-picture show plane.
This secondary light source produces a few locations of stronger highlight on the left side of each water droplet, but has a greater affect on the locations of bandage shadow. In this instance, we come across an area of cast shadow extending well-nigh entirely effectually each droplet. The taller the water droplet is, the longer the cast shadow becomes.
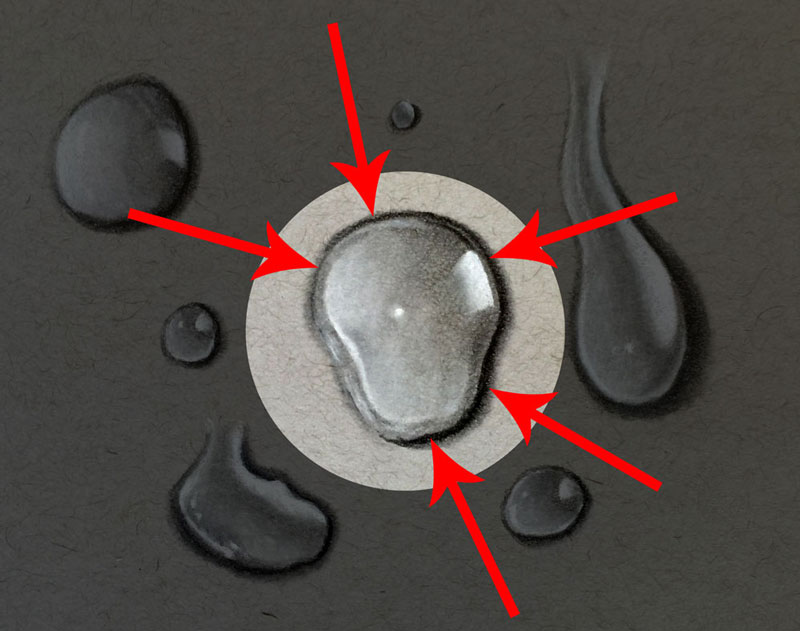
Considering the dominant light source on the correct is more directly and at a less farthermost angle, the resulting cast shadow on the left is still visible, simply non quite as long.
Cartoon A Water Droplet Step by Step
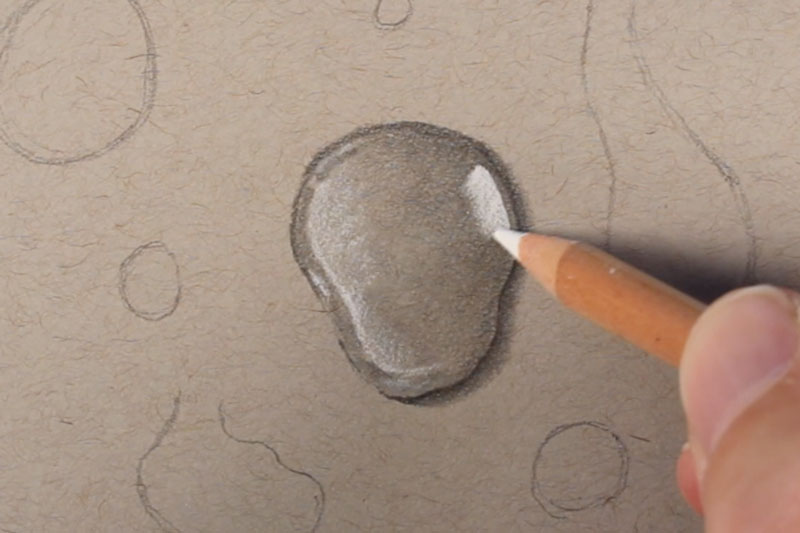
After cartoon simple shapes for each water droplet, we can begin the process of developing the values. We are working on a neutral gray surface so that it is a scrap easier to create a full range of value within the scene. An "HB" and "4B" pencil are used to develop the darker values, while a white charcoal pencil is used to develop the lighter tones.
We'll begin with the "HB" pencil, creating darker values by making controlled, round marks.
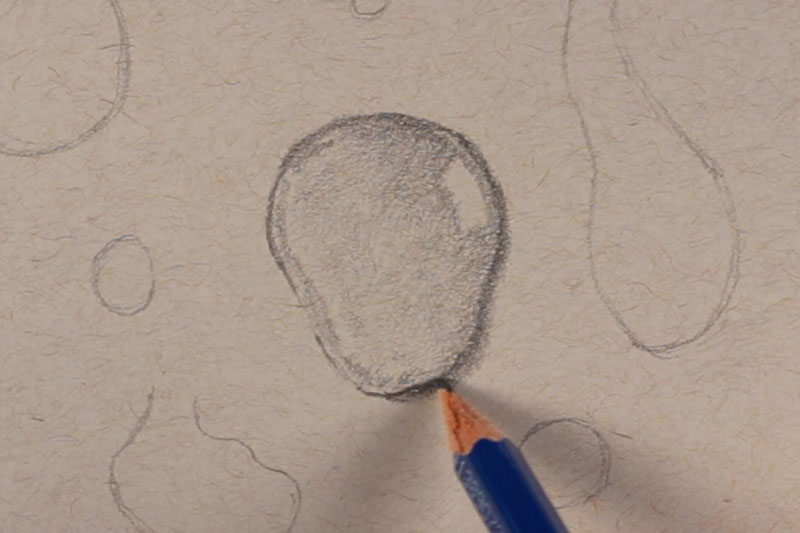
The cartoon surface features a scrap texture that does non result in a natural wait. For this reason, we utilise a blending stump to smoothen the application. Once more, modest circular strokes are made with the tool.
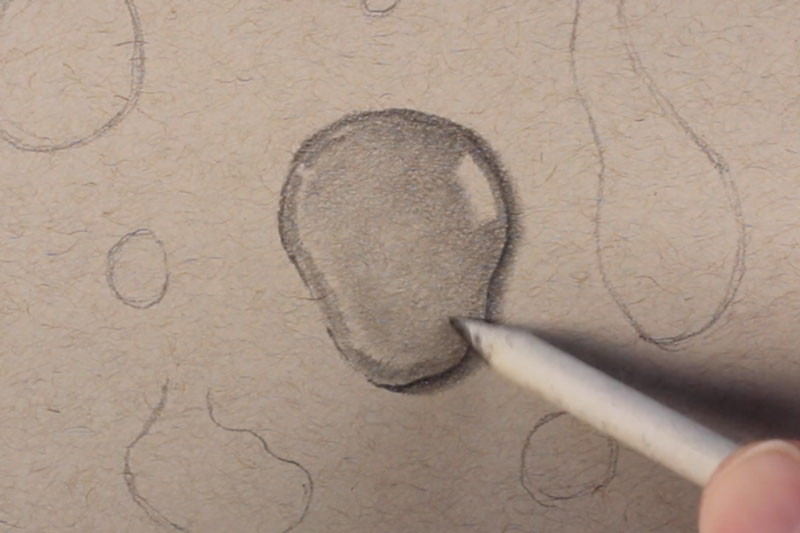
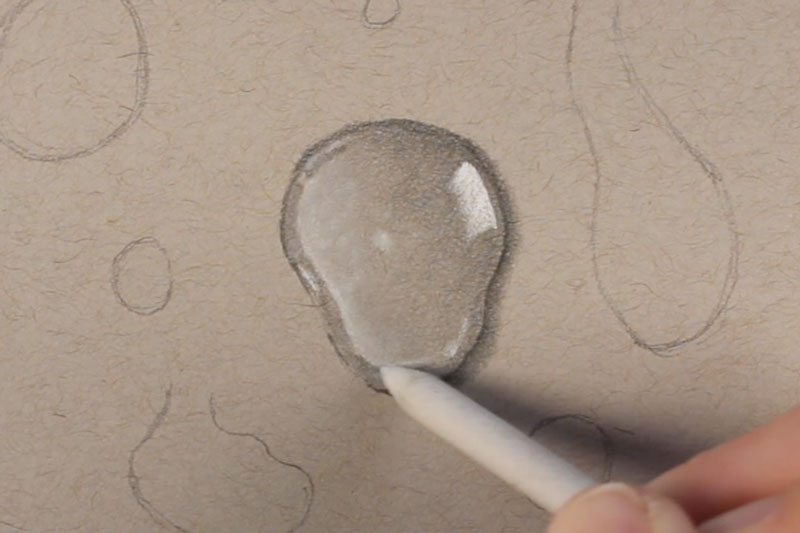
Next, the development of the lighter values begins with a light awarding of the white charcoal pencil. The awarding is much stronger in the location of intense highlight on the right side of the h2o droplet.
In order to keep the texture consistent, this application is also worked in the texture of the newspaper using a blending stump.
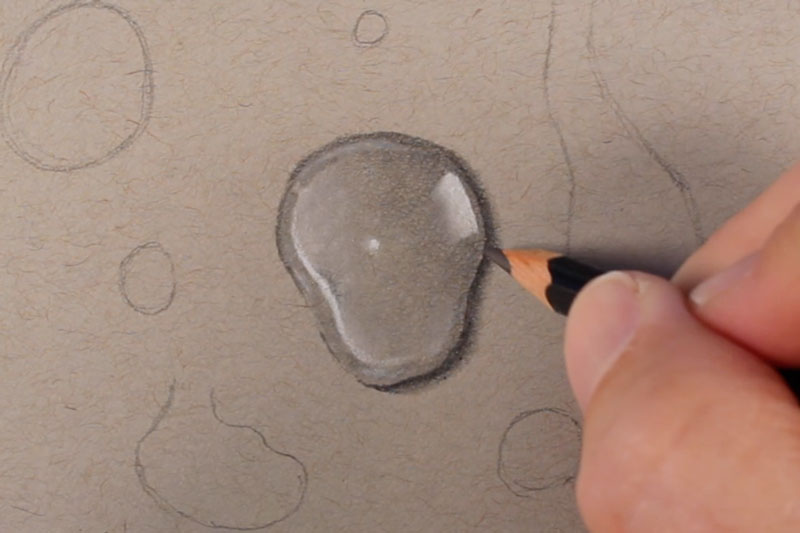
In order to create a broader range of value and to increase the contrast, a softer "4B" pencil is used to darken values, especially in the areas of cast shadow. This darker application is then blended with the blending stump.
Lighter values are then enhanced with the white charcoal pencil and gently composite with the stump to complete the water droplet.
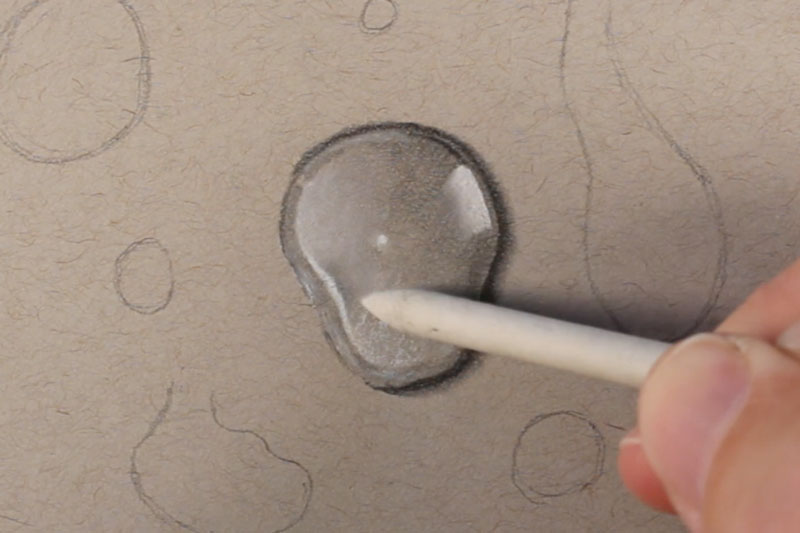
The procedure of developing the values continues in the aforementioned manner on the other water droplets, keeping the lite consistent. Including multiple water droplets within the scene creates a more convincing image.

Source: https://thevirtualinstructor.com/how-to-draw-water-droplets.html
Posted by: hortonwifflife.blogspot.com
0 Response to "How To Draw A Swimmer In The Water Step By Step"
Post a Comment